How do you interpret these glyphs?

Design a Glyph

Use what you’ve learned about Mayan art to create a sculpture that communicates a story or an idea

You’ve seen how Mayan artists incorporated glyphs into their artwork to communicate stories and myths. Now it’s your turn to share an idea about modern life by designing your own glyph.

Step 1: Sketch Your Glyph

Design your glyph on paper.

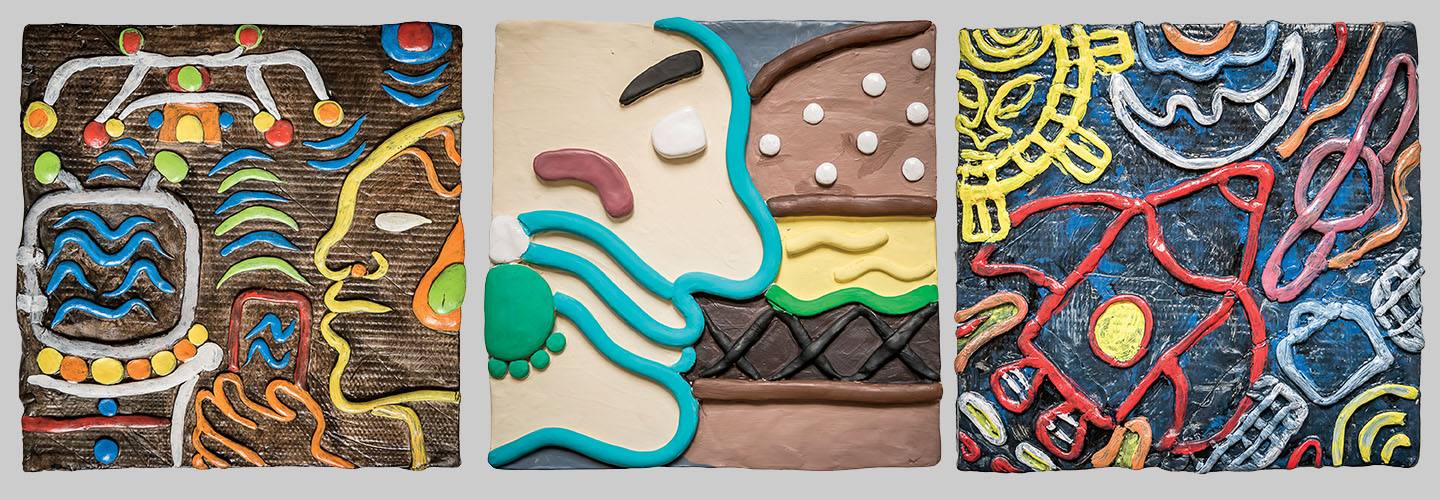
How can you communicate using a language made of pictures? Study the two artworks on page 5 of this issue of Scholastic Art. The artists who crafted them depict Mayan gods and rulers and emphasize the narratives in each scene with glyphs. Share your own narrative by designing a glyph featuring contemporary images. You might explore technologies that you use every day, modern modes of transportation, contemporary forms of entertainment, or life at your school. Loosely sketch your ideas in pencil on paper. Your glyph should include simple, easily recognizable imagery. Once you’ve selected your theme and developed a rough sketch, draw an 8 inch x 8 inch square on a clean sheet of paper. Then create a final scale sketch of your design. Simplify any areas of the drawing that are vague or could confuse viewers.


Tip: Keep your design simple so it’ll be easy to interpret when you re-create it as a three-dimensional glyph.

Step 2: Model Your Glyph

Sculpt your glyph in clay.

Create an 8 inch x 8 inch slab using a polymer clay such as Sculpey. Use a rolling pin to flatten the clay. Make sure your slab is a consistent thickness by placing your Sculpey between two flat wood strips and flattening the clay to the thickness of the strips. Place your final sketch directly on top of your slab and then lightly trace over the outlines of the drawing with a dull pencil. When you lift the sketch off the slab, an outline of your design will remain on the clay. Use the Sculpey that you trimmed from the edges of your slab to make long coils. Place these on your slab to create a raised outline that emphasizes the shapes and forms in your design. When you’re happy with the arrangement of the coils, use blending tools to attach them to your slab. You might choose to add a coil border around the edges of your slab to frame your glyph. Once your glyph is complete, follow the package instructions for baking the Sculpey.


Tip: Vary the thickness of the coils to add details and dimension.

Step 3: Paint Your Glyph

Paint your glyph. Use color to create emphasis.

Once your slab is dry, add ornamentation that reinforces the meaning behind your glyph. Paint the surface of your design in a way that emphasizes the most important areas of the scene. You might choose colors that realistically reflect the objects represented. Or try getting creative, using monochromatic (different shades of the same color), complementary (opposites on the color wheel), or warm/cool color schemes to add visual interest to your design. Paint the largest shapes first, and then add the details.

Tip: Plan ahead. Use contrasting colors to create emphasis and give your design a dynamic energy.

Prepared by: Kara Dobrowolski, Dr. Phillips High School Orlando, Florida

videos (1)
Skills Sheets (1)
Lesson Plan (1)
Text-to-Speech